Sinoriko Replacement Filter Kit 2 Pack
Availability:In Stock
More Info$24.99
Financing Available- Product Code: Sinoriko Cleaner Replacement Filters 2 Pack
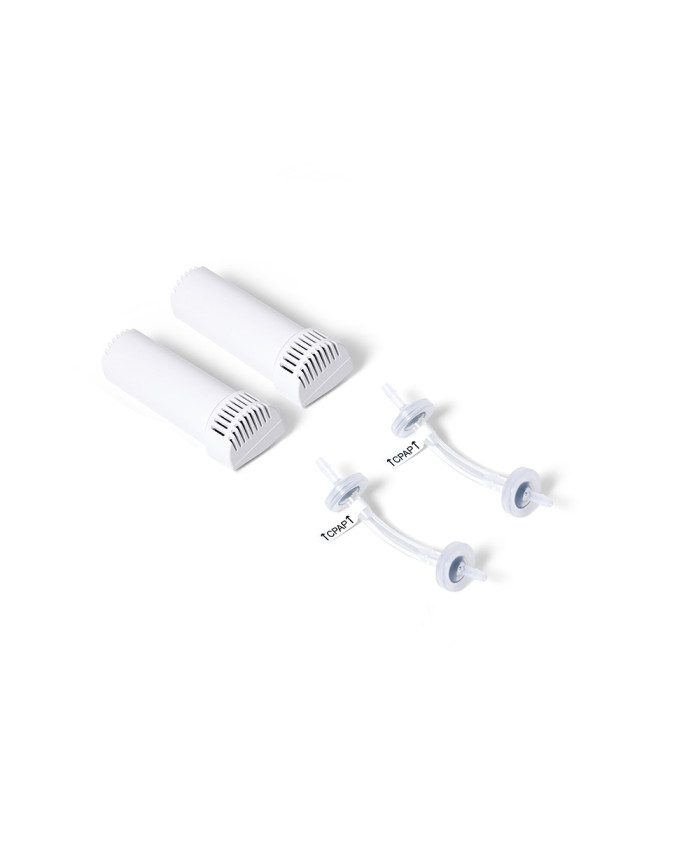
Sinoriko 2PCS CPAP Cleaner Filters & Check Valves Accessories Set
Ensure Optimal Performance and Hygiene for Your CPAP Cleaner
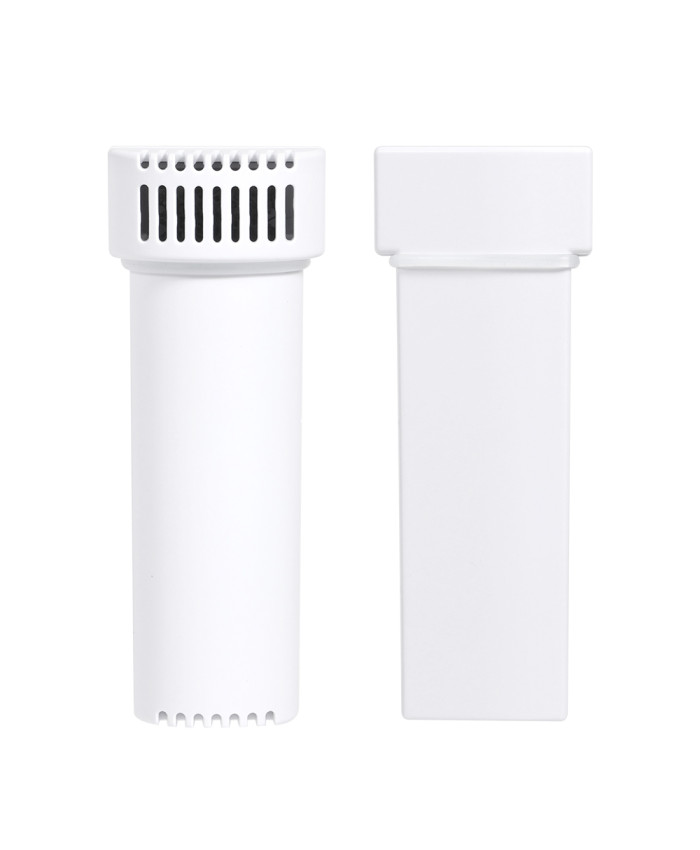
Maintain the efficiency and safety of your CPAP cleaning device with the Sinoriko 2PCS CPAP Cleaner Filters & Check Valves Accessories Set. Designed specifically for Sinoriko CPAP cleaners, this set includes two replacement filters and two check valves, ensuring your equipment operates at peak performance. This filter and check valve should be changed every 6 months to ensure proper ozone filtration.
Key Features:
-
Effective Ozone Conversion: The filters efficiently convert activated oxygen (ozone) back into normal oxygen, ensuring that the air exhausted after disinfection is safe and harmless.
-
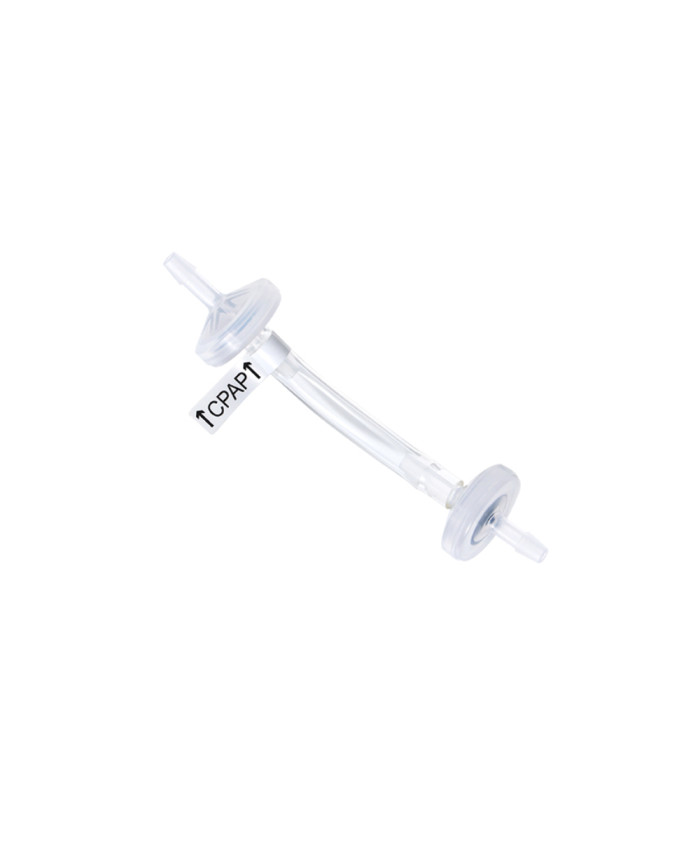
Backflow Prevention: The check valves prevent water vapor or moisture from your CPAP equipment from flowing back into the cleaner, protecting its internal components from potential damage.
-
Eco-Friendly Materials: Both filters and check valves are made of environmentally friendly materials, ensuring safe and sustainable use.
-
Easy Installation: Designed for quick and straightforward replacement, allowing you to maintain your CPAP cleaner with minimal effort.
How the Filter Works:
During the CPAP cleaning process, activated oxygen (ozone) is used to disinfect the equipment. After cleaning, residual ozone needs to be converted back into breathable oxygen to ensure safety. The Sinoriko filter facilitates this conversion, effectively filtering the ozone residue and ensuring that the air exhausted after disinfection is safe and harmless.
How to Replace the Filter:
-
Remove the Old Filter: Open the Sinoriko CPAP cleaner and gently pull out the old filter.
-
Insert the New Filter: Place the new filter into the designated slot within the cleaner, ensuring it is securely positioned.
Note: It is recommended to replace the filter every 6 months for optimal performance.
How to Replace the Check Valve:
-
Remove the Old Check Valve: Grasp the barrel of the old check valve and pull the tubing away from both sides to detach it.
-
Install the New Check Valve: Follow the directional instructions on the new check valve and attach it by connecting the tubing to both ends, ensuring a secure fit.
Note: Regularly inspect the check valve and replace it every 6 months, or immediately if you notice water in the clear tube.
Package Includes:
-
2 × CPAP Cleaner Filters
-
2 × Check Valves