• By Clay Rollyson
  • /
  • /

AirFit N30 now compatible with the AirMini Travel CPAP


AirFit N30 AirMini Setup Pack

Add the AirFit N30 to the list of AirMini compatible CPAP Masks. That makes it the 7th ResMed mask to be compatible with the AirMini Travel CPAP Machine. The current list is: AirFit P10, AirFit N20, AirFit N30, AirFit F30, AirFit F20, AirTouch N20, and the AirTouch F20. Check out our video on how the new N30 AirMini Setup works with the AirMini Travel CPAP Machine.


What other AirMini CPAP Mask Options do you have

AirFit P10 AirMini Setup Pack

The AirFit P10 Setup Pack for the AirMini Travel CPAP comes with everything that you need to connect and use your AirMini. It includes the P10 Mask with Small, Medium, and Large Pillows, the AirMini Tubing, as well as you initial 2 HME (heat moisture exchange) kits.

AirFit & AirTouch N20 AirMini Setup Pack

The AirMini N20 Setup pack will work with the AirFit N20 and the AirTouch N20 Full Face CPAP Masks. The AirMini N20 setup pack comes with everything that you need to connect your AirFit or AirTouch N20 to your AirMini. It does not include the N20 Full Face Mask.

AirFit & AirTouch F20 Setup Pack

The AirMini F20 Setup pack will work with the AirFit F20 and the AirTouch F20 Full Face CPAP Masks. The AirMini F20 setup pack comes with everything that you need to connect your AirFit or AirTouch F20 to your AirMini. It does not include the F20 Full Face Mask.

AirFit F30 Setup Pack

The AirMini F30 Setup pack comes with the AirMini Tubing and adapter that you need to connect your F30 Mask to your AirMini Travel CPAP Machine. It does not include the AirFit F30 Full Face Mask itself.

Want to learn more about the AirMini Travel CPAP Machine

The AirMini Travel CPAP is the smallest and lightest available. Plus is has the long-term reliability and comfort that make it a great option compared to any other CPAP. Check out the link below to find out why the AirMini Travel CPAP might be right for you.

AirMini Travel CPAP Machine

Continue reading...
  • By Clay Rollyson
  • /
  • /

How to connect Oxygen to your CPAP Machine

Can Oxygen be connected to a CPAP machine?

Yes it can. In cases where your Doctor has prescribed both Oxygen Therapy and CPAP Therapy, those two Therapies can be combined using a simple Oxygen Bleed-In Connector. However, there are some cases that can make that connection a little trickier. It is important to always consult with your Doctor regarding your Oxygen and CPAP needs.

How to Connect Oxygen to the CPAP with a Bleed-in connector

The Bleed-in connector is the simplest way to combine Oxygen and CPAP. This connector usually connects between the outflow of the CPAP and the CPAP tubing. Then, you connect your Oxygen Tubing to the smaller nipple on the side of the Bleed-in Connector. It can also be connected between the end of your CPAP Tubing and the CPAP Mask. If you decide to connect it with the second method, then you will have two tubes coming to your CPAP mask. It can be good to use tape or some sort of strap to keep the two tubes together to make sure that the oxygen tube does not disconnect at night. With both of these options you will want to make certain that your Oxygen Concentrator is set at the prescribed setting from your Doctor. If you are unsure of that setting, you should consult with your Doctor immediately.

How to Connect Oxygen to a CPAP with heated tubing

If you use Heated Tubing on your CPAP machine, then connecting your oxygen can be a little trickier. There are two methods for making this connection happen.
  1. The first would be similar to the second option that we described above. You would need to place the Bleed-in connector in between the CPAP Mask and the end of the CPAP Tube. Then connect your Oxygen Tube in to the smaller nipple on the side of the Bleed-in connector.
  2. The second option would be for you to purchase a Heated Tube with a built in Oxygen connector. For instance, the AirSense 10 and AirCurve CPAP from ResMed have a ClimateLineAir Oxy Tube available. That particular heated tubing has a built-in oxygen port so that you can connect the Oxygen directly into the elbow of the Heated Tubing. If your CPAP Machine does not have this option then you will have to use the first method described above.

How to get Oxygen for a CPAP Machine

The first step in the process is to consult with your Doctor. In many cases a Doctor that is concerned about your Oxygen levels they may issue an Oximetry Test. That test is usually worn overnight at the same time as wearing your CPAP. It records your oxygen levels throughout the night so that the Doctor can determine what your oxygen level are doing at night. If the Doctor determines that your oxygen levels are too low, even on your CPAP, then the Doctor may order Oxygen to be bled into your CPAP. In this case you would more than likely need to obtain an Oxygen Concentrator and it would be set at a prescribed Liter Flow. Then, that Oxygen Concentrator would be connected to your CPAP using one of the methods described previously in this blog. If you are purchasing your own Oxygen Concentrator be sure that it is a Continuous Flow model instead of a Pulse Dose Oxygen Concentrator. Most of the Smaller Portable Oxygen Concentrators are “pulse-dose” and will not work for bleeding into CPAP.
Continue reading...
  • By Clay Rollyson
  • /
  • /
The DreamStation 2 CPAP from Philips Respironics is a big time game changer in the CPAP market. It isn’t very often that we get to debut a new CPAP from a major sleep manufacturer, but today we get that pleasure. It features some great improvements over the predecessor as well as some completely new and innovative options.

What is new about the DreamStation 2 CPAP?

Ready to buy the DreamStation 2 Auto CPAP?

(Click Here)

The DreamStation 2 name is a little disingenuous to us here at CPAPmyway. It really should have had a completely unique name, because it is a completely different CPAP from the original DreamStation line. Here are some of the headline features that make the DreamStation 2 so much more than an upgraded model.

Way Smaller and Lighter

The DreamStation 2 is 25% smaller and 50% lighter than the original. It weighs in completely assembled at just 2.29 lbs. That is as light as some of the Travel CPAP models we carry. Additionally, the DreamStation 2 is just 10.78″L X 6.24″W X 3.34″T. This makes it way smaller than the original, meaning that you have way more room on your nightstand. On top of all that the travel case is much smaller as well. At just 6″ X 6″ X 15″ you will not only notice the lighter carry-on, but you will have a much easier time finding a spot to put your CPAP on your next flight.

DreamStation 2 Color Touchscreen

The DreamStation 2 features a full color touch screen operation. Access all of your patient menus with ease, and adjust with just a swipe. No more knobs and extra buttons. When your Auto-on and Auto-off feature is enabled, you may never touch another button on a CPAP again. The real change operationally is the simplified menus. You still have access to the necessary patient level adjustments, but you don’t have all the extra icons for irrelevant adjustments that nobody ever used.

New Modern look

The DreamStation 2 CPAP is all-black with a very sleek design. We all know that black is slimming (which is why I wear it quite a bit), but it is also way less noticeable on the night-stand. This gives a much less “medical” feel to your CPAP as well as a more modern look. The touchscreen is on the top of this CPAP which is also nice, because you don’t have yet another screen staring back at you every night.

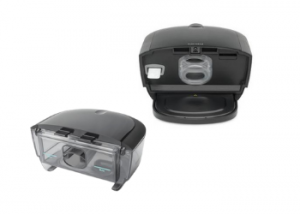
DreamStation 2 Integrated Humidifier System

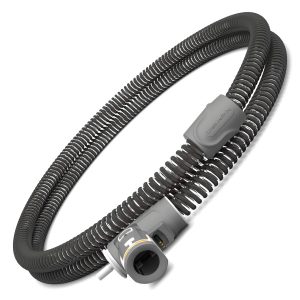
This is another big advancement on the DreamStation 2. The integration of the Humidifier system is one of the biggest reasons for the smaller size. Because Philips made the humidifier part of the CPAP, the size and complications have been greatly reduced. What is really cool about the humidification portion of the the DreamStation 2 is the new 15mm heated tubing that is available. This new heated tubing is by far the thinnest and lightest heated tubing available. Ensuring not only that you will maintain perfect moisture without the rainout, but much less hose-drag as you move in bed.

RampPlus Ramp Feature

This feature on the DreamStation 2 was a little surprising to us. You can now adjust your starting ramp pressure up on your own. A high as 10cm in fact. Of course this will only last throughout the ramp portion of the therapy, but for those thinking about upgrading from an old-school fixed pressure CPAP to an Auto, you will be glad. One issue that we encounter from time to time is when an existing fixed pressure CPAP user upgrades to an Auto-CPAP we get the “there’s not enough pressure” or “not enough air” response. This is usually because the Auto CPAP is going through a learning process and it starting out the pressure lower than the user is accustomed to. That won’t be an issue on the new DreamStation 2. You are now the captain of your own starting pressure.

DreamStation 2’s Simple Connectivity

The DreamStation 2 has everything built in to one device. In the previous model you had the options of cell modem, wifi, or bluetooth connectivity. It has simplified this to just one model featuring cell modem and bluetooth connection. This ensures that you have the communication that you need back to your provider, physician, or employer. Whether you want to use the DreamMapper app or not, the data will flow seamlessly.

DreamStation 2 CPAP in a nutshell

The DreamStation 2 is an awesome CPAP. It is much smaller and lighter than it’s predecessor, as well as the competing home CPAP models. It has all the amazing comfort and performance features that you expect, plus some great new additions to make life easier and more comfortable. With the completely new design and layout your nightstand will have way more curb-appeal as well as much more open space. The DreamStation 2 will be a welcome upgrade to the CPAP world.

Ready to buy the DreamStation CPAP? (click here)

Continue reading...