• By Clay Rollyson
  • /
  • /

Foam CPAP Mask Seals

For as long as CPAP masks have existed silicone has been the standard. Now, there is another option. Memory Foam CPAP masks have become a very interesting alternative to the silicone options. There are pros and cons to the memory foam as well as to the silicone. So, let’s take a deep dive and see what the right option for you might be.

What are the Foam CPAP Mask Options?

ResMed has been the trend setter in the memory foam category. They have a full-face option as well as a Nasal option. The full-face mask is the AirTouch F20 from ResMed. The Nasal is the AirTouch N20. Both have the same sizing, frames, and accessories as their AirFit F20 and N20 counterparts, but the AirTouch versions use memory foam seals. Both of these masks have been around for a while now, and both are available in small, medium and large sizing.

How does the Memory Foam Mask Work?

There is very little difference between how the memory foam CPAP masks work compared to the silicone versions. They are fit with standard headgear and seal against your face. However, the foam is all that touches your face instead of silicone. You tighten the mask as needed with the headgear to account for leaks and to improve your fit. The foam provides a very reliable seal without the abrasion that silicone can sometimes cause.

What are the upsides to a Memory Foam CPAP Mask?

  • Very Comfortable– You really cannot beat the comfort level of the memory foam. When tested by CPAP users it is almost always rate as “more comfortable” than their current mask.
  • Great for Beards– The foam does a great job of sealing against facial hair without having to overtighten the straps.
  • Great for people with silicone allergies– If using silicone causes skin issues or rashes, then a foam seal can make a huge difference. It would certainly be worth a try.
  • Really helps with those annoying lines on your face in the morning– The foam will give a more dispersed and soft seal against the face. This greatly reduces those impression lines that you have in the morning.
  • Reduces abrasion– Silicone is a bit tacky and can rub your skin to the point of breaking it down. Foam does not create this issue.
  • Seals extremely well– the foam contours extremely well to your features. This allows you to seal without having to over-tighten the mask.
  • Low maintenance– The foam is built to last 30 days with little to no maintenance at all. At most a simple wipe with a Mask Wipe is all that is needed.

What are the downsides to a Memory Foam CPAP Mask?

  • They do not last as long– You will not get nearly as long out of the foam seal versus the silicone seal. Many users will keep an extra seal around just in case the primary wears out.
  • When it is done, it is done– When the foam seals go bad, they do not work at all. Typically, the foam will tear lose from the silicone base of the seal, and the air will escape through the tear.
  • You can’t wash them– You cannot wash the foam seal at all. Exposing it to soap and water will deteriorate the seal almost immediately. The only cleaning option is the mask wipes for cleaning.
  • Foam sometimes separates from the seal frame– The foam is attached to the silicone base of the mask seal. When the seal wears out, this is where it typically separates. This makes the seal useless at that point.
  • Cost– They are not cheap, and they have to be replaced more often. So, you will not get off as cheaply as with silicone.
  • You cannot use ozone– Ozone will almost immediately destroy the memory foam. If you use a SoClean or Sleep8 CPAP cleaner, then you have to take the seal off of the mask before you put the rest of the supplies in for cleaning.

Sizing yourself for a Memory Foam CPAP Mask:

Sizing yourself for the AirTouch N20 or AirTouch F20 Memory Foam CPAP masks is very easy. We have links below to the sizing gauges. Then simply follow the steps below to find your right fit.

Fitting your Memory Foam Mask:


  1. Use the links above to print your sizing gauge.
  2. Cut out the sizing gauge, ensuring that it is to scale.
  3. Use the gauge in a mirror to see which size is best for your features.
  4. Place the order here for your AirTouch N20 or here for your AirTouch F20.

How to clean a Memory Foam CPAP mask:

You have to be careful when you clean a memory foam mask. You must first make sure that you remove the seal from the mask frame before you wash the rest of your supplies. The only method for cleaning your memory foam mask is a CPAP mask wipe. Even when you are using a mask wipe, then you need to be careful not to scrub harshly or pull at the foam. The foam cushion is built to maintain cleanliness without washing for up to 30 days.  
Continue reading...
  • By Clay Rollyson
  • /
  • /

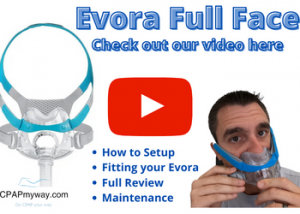
Evora Full Face Mask

Evora Full Overview:

The Evora now accounts for the 5th minimal contact full face mask on the market. I define that style as full-face masks that do not go over the bridge of the nose. The direct competitors to the Evora are the Amara View from Philips and the F30 from ResMed. The Evora does not disappoint in that competition what-so-ever. Let’s break down the highlights.
  • Dynamic Support Technology- The Evora features a floating seal and stability wings on the seal itself. This allows for the seal to float on the face when the CPAP is on. That gives a great seal with very minimal tightening on the face. The stability wings keep the seal in place to give you a great freedom of movement. This has allowed the Evora full face to fit 91% of trial CPAP users.
  • Top Notch Headgear- The headgear on the Evora full has to be the best in the minimal contact category. The VentiCool fabric on the back of the straps allows your head to stay cool and comfortable. Additionally, the Velcro that F&P uses on all of their masks is top notch. It lasts a long time and adjusts very easily.
  • Fitpack option- The Evora full has an X-Small, Small/Medium, and Large seal option, and all of them fit the same frame. Additionally, this mask can be purchased as a Fitpack with all of those sizes included.
  • Minimal Contact design- The design of the Evora keep the entire seal below the nose while still allowing you to breath through your nose or mouth. That means nothing in your line of sight at all. Wear glasses, watch TV, or read in bed with your mask on.
  • Quiet Exhalation- The exhalation ports on the front of the mask are at the bottom sides of the frame, near the tube connection. These ports direct the air in to directions and reduce the exhalation draft that can bother the bed partner or CPAP user.
  • Quick headgear connections- It also features simple clips and a quick attach snap that makes taking the headgear on and off the frame super simple.
  • Built to last- The Evora is not junk. The main parts that wear on CPAP masks are the seals and the headgear. Both of those parts on this mask are built for longevity.

Fitting your Evora Full Face Mask

  1. Hold the front of the Evora frame with one hand the headgear in the other. Bottom headgear clips should be unhooked.
  2. Place the seal on your face and guide the headgear over your head. Make sure that the seal is below the nose.
  3. Hook both of the headgear bottom clips to the frame.
  4. Gently tighten the headgear straps. Start with the blue top straps, then move to the bottom. Pull on both sides evenly. Tighten to comfort and stability.
  5. Attach your Evora Mask tube to the CPAP tubing and start the CPAP machine.
  6. Make final adjustments to the headgear to ensure a proper seal. Be sure to adjust evenly on both sides of the headgear.

Evora Full Face Maintenance

Cleaning and Maintaining your Evora full face is not difficult, but has to be done. If you do not keep up with the cleaning, then you will risk performance issues with the mask and can even cause serious health issues. We have seen some nasty things in CPAP masks around here. Don’t be that person. 😉 You can divide your Evora full maintenance into parts that need daily cleaning and parts that need weekly maintenance.

Daily Cleaning Evora Full:

After each use you must wash the Frame and the Tube of the mask. This means that you will mix a light soap and warm water. Then submerge the Mask and tubing into the water. Handwash until visually they are both clean. Then rinse the parts until all of the soap residue is gone. Leave parts out to air dry and then reassemble for use. Do not leave them out in the sun.

Weekly Cleaning of Evora Full

The headgear portion of the Evora can be hand washed weekly to ensure that it works well and lasts a long time. Over-washing the headgear can cause it to wear out early. The Headgear and clips can both be washed in the same manner as the Evora frame, cushion and tubing. Make sure to allow time for it to air-dry fully before reassembling.

Evora Full Face Pros and Cons

The Evora certainly has its ups and downs, like any other CPAP mask. Many of those are completely different for each different CPAP user. For instance, if someone has a pointy thin nose versus a short stubby nose, their CPAP mask results will be drastically different. So, take my opinion with a grain of salt.

Evora Pros:

  • High-end headgear– You cannot beat this new version of F&P headgear. It is long-lasting, comfortable, and easy to attach and detach. It also has really cool quick attach snaps that make taking headgear off for cleaning very easy.
  • Great “side of nose” sealing– The “wings” that come up along the sides of your nose help to reduce the leak up the sides of your nose. That is something that other Minimal Contact full face masks do not do well.
  • Quiet Exhalation port– The exhalation ports on the Evora are located on both sides at the bottom of the seal and are directed downward. This gives a very low-draft exhalation, and that is great for the CPAP user and the bed partner.
  • Low profile design– The tube connection comes off the bottom of the mask frame. This allows for a very low-profile front of the mask. This feature is great for side sleepers and those that move back and forth.

Evora Cons:

  • Mask tube is a little stiff– The tube that comes off of the front of the Evora is a little stiff and does not rotate very well. The only downside to that is if you move around a lot in bed. I would say that the best mask tube is the one on the Amara View for your reference.
  • Seal can be tough to remove– I do not think that the average person will have much trouble, but for older CPAP users or those with bad dexterity it may be difficult. The seal snaps in to place on the Evora and it takes a pretty good pull to get it out. Especially, when it is brand new.
  • Stop using two sizes on one seal– This is not a functional issue, but I cannot understand why F&P needs to make a “Small-Medium” size seal. Can we please just call it Medium or Small? 🙂 It really is an issue at times when we are trying to determine by phone which size someone is using. But again, it is not a functional issue at all. Just confusing.

Evora Parts List

Mask Kits

Extra Small (EVF1XA), Small/Medium (EVF1MA), Large (EVF1LA) and FitPack (EVF1XMLA)

Headgear

Standard (400EVF121) and X-Large (400EVF122)

Replacement Seals

Extra Small (400EVF114), Small/Medium (400EVF115), and Large (400EVF116)

Accessory Parts

Evora Headgear and Frame Clips (400EVF141), Evora Spare Tube replacement (400EVF151)  
Continue reading...
  • By Clay Rollyson
  • /
  • /

Luna G3 Auto BPAP Bilevel

In the Bilevel world there are very few options available these days. So, when we get to demonstrate and review a new one, we get pretty excited. The Luna G3 BiLevel was not a disappointment. We took our time checking out all the pros and cons in addition to the setup and operation. Let’s dive in for a deeper look.

What makes this Bilevel different?

The Luna G3 has all the features of the more “well-known” bilevels like the AirCurve or the DreamStation Bipap at a more cost-effective price. It provides both fixed pressure and Auto-Bilevel therapy. Additionally, it provides great compliance and therapy reports that can even be done on your own with the web-based program. We have a great demo video of how to do that here. So, it will work well for following up with your doctor or DOT clinic. This bilevel is also very easy to setup and maintain, so let’s jump in there.

Setup of the Luna G3 BPAP

Setting up your new G3 Bilevel is a pretty simple process, and very similar to most other CPAP setups with a few exceptions. Your unit should come to you preset with the settings from your prescribing doctor. If you aren’t sure about that, you should contact your supplier immediately to verify. After unboxing all the parts and pieces follow the steps below for a quick and effective setup.
  1. Unpacking– Make sure that you get everything out of the bag. That should include the power supply (two parts), the Luna G3 itself, humidifier chamber, tubing, and power cord lock.
  2. Power up– Next you will connect the G3 Bilevel power cord to the power box, plug it into your wall outlet and then into the back of the machine. At this point, you will also add in the power cord lock to make sure the cord stays in place.
  3. Add your humidifier chamber– When you put the humidifier chamber on it can be a little tricky. Make sure to slide it down from the tops and click it gently into place. Press down firmly until you hear the click, and you see the chamber sitting flush in place. You can add your distilled water to it by flipping open the lid and filling to the max line.
  4. Connect your tubing– You may have standard or heated tubing included with your G3 BPAP, but the setup is similar. If your tubing is heated then, one end will have a small cord and connector. That end of the tubing with the plug will connect to the machine. The small plug will go into the little outlet right beside the air outlet where your tubing plugs on. The attachment of standard tubing is similar, but either end can plug on to the unit.
  5. Attach your mask– The final step of setting up your Luna G3 BPAP is to attach the mask. It will attach at the other end of the tubing. Be careful if the mask does not fit easily. You may be missing a part on your mask if you have used it on another previous CPAP or Bilevel. We have a great video here demonstrating this issue.
  6. Get some rest– You are ready to fire that baby up and get some much-needed rest. Check out our blog on getting accustomed to therapy next for some great tips.

Maintenance of the Luna G3 BPAP

Taking care of your new Luna G3 BPAP is a pretty simple deal. However, a failure to keep up with these items, may lead to a machine failure or nasty mold or mildew. There are 3 basic areas of maintenance. The Humidifier Chamber, Intake filter, and the Mask and tubing. Let’s go over those details:
  • Humidifier chamber– This has to be one of the most important pieces to maintain. That is because of all the nasty things that grow in unmaintained water chambers. Best practice is to fill the tank nightly and empty it in the morning. Allowing it to air-dry throughout the day. Then wash it with mild soap and warm water at least once per week. This water chamber is dishwasher safe on the top rack.
  • Intake Filter– The filter that comes with the Luna G3 BPAP is a foam washable filter. It needs to be removed and rinsed thoroughly once per week. Make sure to dry it well before putting it back in the filter housing and reattaching to the machine. Washable filter should be replaced every 6 months to avoid breakdowns.
  • Tube and Mask– The mask and tubing should be washed with the same warm soapy water as the humidifier chamber. Most manufacturers recommend daily washing, but we say at least twice per week. Make sure to use only mild soap, to rinse thoroughly, and to dry thoroughly before using it again.

Luna G3 overall review

Overall, we found that the Luna G3 is a great option for customers using bilevel therapy. It is just as small and easy to operate as the higher-end models, without the additional cost. What is really nice is that the Luna G3 bilevel does have some features that the bottom dollar options do not have. Let’s check out our top Pros and Cons:

Luna G3 BPAP Pros:

  • Easy operation and setup– There is no difference between the setup and operation of this Luna G3 and the high end bilevel options on the market.
  • Small footprint on the nightstand– At 10.4″ long by 5.7″ wide and just 4.5″ tall you aren’t going to get much smaller for a bilevel. We know “night-stand real estate” space is hard to come by.
  • More therapy mode that others– One really cool advantage is that the Luna G3 BPAP has: fixed bilevel, auto bilevel, fixed CPAP and Auto CPAP all built in to one unit. That is an awesome feature that I do not think any other bilevel has. So, if something about your therapy needs changed you have options.
  • Pretty quiet– I would not say it is the quietest of all bilevels, but it is pretty darn quiet. At a setting of 10cm the unit produces about <34 dB(A) of noise.
  • Heated tubing option– Many low-cost CPAP and Bilevel do not offer a heated tube at all. The Luna G3 BPAP does. For those that live in dry climates or have dryness issues that is a GREAT addition.
  • More affordable– This model offers a really good bilevel therapy at a lower cost.

Luna G3 BPAP Cons:

  • Humidifier chamber can be tricky– Taking the water tank on and off can be a little tricky. You have to press down firmly on top of the chamber to lock in place and then as well to remove it. If it doesn’t click and pop into place or lose to remove it, then you need to press again until you hear the click.
  • Compliance and therapy reporting– While there are multiple options for retrieving your data from the Luna G3 BPAP, they do involve some manual effort. You can use the QR code in the App, call in your iCode string, or manually download to the software via the SD card.
  • Thick Heated tube– Most models have a 15mm option and some even have a 12mm tube diameter option. Those diameter options are not available in the G3 BPAP as of now. For many users this is no issue at all, but some really like the thinner/lighter style tubing.

   
Continue reading...
  • By Clay Rollyson
  • /
  • /

SoClean and CPAP

We have had no shortage of customer asking this question. So, we want to clear up our stance on whether the SoClean should be used on your CPAP or not. To be as up front as possible, we do carry and sell the SoClean CPAP cleaner. If a customer wants one, we will currently sell it to them. With that being said, there are things that you should consider if you want to use a SoClean on your CPAP. Let’s dive in on the details.

Do ResMed and Philips Respironics Recommend Using SoClean?

What Has ResMed Said About SoClean?

Most CPAP manufacturers, including ResMed, do not recommend using integrated ozone CPAP cleaners like SoClean. A few years ago, ResMed issued a statement cautioning against the use of ozone-based cleaners on their CPAP machines, warning that doing so may void the device’s warranty. In response, SoClean offered to cover the cost of repairs for customers affected by voided warranties, sparking an ongoing debate between the two companies.

What Has Philips Respironics Said About SoClean?

Initially, Philips Respironics remained quiet on the subject of SoClean and ozone cleaners. However, following their major recall, Philips stated that ozone CPAP cleaners could have contributed to the degradation of foam in their CPAP devices. Philips even included a question about ozone cleaners in their recall forms, indicating concerns over the potential impact on their equipment, though they stopped short of making a direct statement against SoClean.

What Issues Can SoClean Cause on CPAP Devices?

The SoClean CPAP Cleaner uses ozone (O3), also known as ionized oxygen, to sanitize CPAP machines, tubing, and masks. While it’s highly effective at killing bacteria and viruses, the integration of ozone can lead to issues over time. Ozone is corrosive and may degrade the plastic and metal components inside your CPAP, potentially shortening its lifespan.

Should You Use SoClean with Your CPAP?

Deciding whether to use SoClean for your CPAP sanitization can be challenging. On one hand, SoClean is highly convenient, offering a “set-it-and-forget-it” solution. It’s tested for safety and effectively sterilizes your CPAP equipment. On the other hand, its use of ozone may contribute to wear and tear on your CPAP’s internal components, reducing its lifespan. If convenience and ease of use are your top priorities, SoClean might be a good option. However, if you’re focused on maximizing the longevity of your CPAP device, you may want to explore other cleaning alternatives, such as non-integrated options like the Sleep8 CPAP Cleaner or the PAPClean CPAP Cleaner.

What does the FDA say about Ozone CPAP Cleaners like SoClean?

The FDA has issued general guidance on the use of ozone cleaners for CPAP devices, although they haven’t specifically targeted SoClean. To read the FDA’s statement on the safety of ozone-based CPAP cleaners, you can follow the link to the official FDA article on ozone CPAP cleaners.

Continue reading...
  • By Clay Rollyson
  • /
  • /

CPAP Compliance

CPAP compliance is something that many CPAP users have come to hear a lot about. Especially if you are a truck driver or you are using your insurance for the purchase of your CPAP machine. Compliance is just what it sounds like. It is whether or not you are using your CPAP. So why is everyone so concerned about you using your CPAP? Let’s start off by explaining that, then we will go over the metrics of compliance as well as some tips and tricks for becoming compliant.

Why is my insurance concerned about my CPAP Compliance?

If you used your insurance to purcahse your CPAP machine, then you are most likely under a rental program. The insurance company is only going to pay for your CPAP if you are actually using it. And “using it” is defined by the insurance company. For most insurance providers, they will want to see a bare minimum of 70% usage. That usage has to occur within the first 90 days typically. If you do not meet this requirement within their time frame the insurance company will most likely stop paying for your CPAP. In turn, your CPAP supplier may force you to pay for the balance on the CPAP or even repossess the CPAP from you. One nice thing is that the insurance company is typically only concerned during the first few months of you having the CPAP. After you have met the initial compliance standards, they finish paying for your CPAP and leave you alone. In other cases, they may make you prove compliance every time you re-order your CPAP supplies.

Why do Truck Drivers need to be Compliant on CPAP?

For truck drivers we have had a bunch of different compliance experiences. For most truck drivers they are required to show a compliance report every year at their medical card renewal. This report is usually just a 30-day report, but in some cases the DOT clinic will ask for a 90-day report. With either of those the DOT clinic usually wants to see a minimum of 70% compliance usage as well. However, we have seen a bunch of trucking companies that monitor their drivers CPAP compliance daily. And some of those trucking companies want 90% compliance. The reasoning is obvious to most and aggravating to a lot of truckers. That reason is safety. When a driver has sleep apnea the risk for drowsy driving or falling asleep at the wheel can be very high. So, the DOT and employer want to be sure that their drivers get quality sleep. For more information on that visit the FMCSA Sleep Apnea page here.

How is CPAP compliance calculated?

CPAP compliance is a pretty simple formula. In order for a day/night to be considered compliant you must use the CPAP for at least 4 hours in a 24-hour period. Those 4 hours do not need to be consecutive, but it is important to remember that most CPAPs split the day at 12 noon. That is because most people use the CPAP at night. The next metric that is super important is the actual percentage. That is calculated by dividing the number of days you have used it over 4 hours by the total number of days selected. So, if you need to be 70% compliant on a 30-day report, then you need to have a minimum of 21 days with over 4 hours usage.

Tips and Tricks for becoming compliant

When you are trying to become compliant on your CPAP every bit of usage is critical. That means that even while you are practicing on your CPAP you are gaining time. We push new users to practice during the day with their new CPAP. This helps with acclimating to CPAP therapy as well as getting good usage hours on your CPAP for compliance purposes. Another great tip is to avoid procrastination. If your mask isn’t comfortable, then make a change. Do not procrastinate on that change. We give a 30-day guarantee on our masks which allows you to make a mask change for free. Make sure that whoever you are dealing with, that they have a similar program.

How do I get my CPAP Compliance report?

Obtaining your CPAP compliance and therapy report is completely dependent on what make and model CPAP that you have. For some models, the CPAP will automatically transmit the data via cell towers back to your provider. For these models your CPAP supplier should be able to pull that data for you any time you need it. We provide that service here at CPAPmyway for free when you buy your CPAP here. Models that automatically transmit data for you would be the DreamStation 2 or the AirSense 11 CPAP. Other CPAP models may require a physical download to a computer via SD card. In these cases, you may need software or web access to retrieve that data. If you are going to have your provider retrieve that information, then you will have to present the card to them physically. Some models like the iBreeze or Luna 2 will allow you to perform your own download at home to obtain the report.

How can I avoid dealing with CPAP Compliance?

The answer to that question is part of what defines us here at CPAPmyway. In short, you can pay cash for your CPAP to avoid the insurance standards. In that scenario you do not have to worry about insurance standards. We have a great selection of CPAP Starter Packages as well as prescription services for those needed help with that as well. For truck drivers on the other hand there is no shortcut. If you have Sleep Apnea and want to continue driving, then you will have to use your CPAP. For most, once they become accustomed to the CPAP, they wouldn’t give it up anyway. The improvement in quality of life is well worth the effort of using CPAP.
Continue reading...
  • By Clay Rollyson
  • /
  • /
If you are looking to get started on CPAP, then I am sure that you have some questions. In this blog we hope to help you down that path. For many people they feel like they are being pushed in a singular direction by a doctor or CPAP supplier, and that is why you need to keep a few things in mind. Before we get to those details, we should make sure that we are on the same page. This blog information is designed for those that have been diagnosed with sleep apnea and need to get started on CPAP for the first time. If you need to be Tested for Sleep Apnea or need to Renew a CPAP Prescription, we have great options to help you there as well.  

What is the most important thing about Starting on CPAP?

For many people the first thing that they are going to think about is the make and model of the CPAP machine. While that is an important thing to consider, you may really need to think about the mask first. The truth about CPAP machines is that most of them do about the same thing therapy-wise. Of course, there are pros and cons to consider on the CPAP, but the most important consideration should be the mask. That is the part that will be touching your face, and the most interactive part of your therapy. Whether that mask fits and is comfortable will be the single most influential part of your therapy. We have a full mask selection blog that will guide you along that path. You can click here or the image below to check that out.

How do I select my first CPAP Machine?

So, you have decided the mask that you want to start with. Now your focus has to move to the CPAP machine itself. I like to think of a CPAP in terms of a vehicle. You can buy a giant truck capable of hauling heavy loads, but if you never haul anything, you might should have just bought the fuel-efficient model. The same can be said for your first CPAP machine. There are some that are smaller, some that have really cool apps to track your sleep, and even some that are built for travel. With all of those options the first thing that you have to do is consider your needs. Here are some questions to ask yourself that might help narrow down the choice.

Do you need Compliance Reports?

Maybe you are a truck driver or someone that needs to be able to obtain Compliance and Therapy reports of your CPAP usage? If that is the case connectivity will be a very important function. Many CPAPs like the AirSense 11, the Luna G3, or the DreamStation 2 come fully equipped with Cell Modems and Bluetooth. That means that your data can be automatically relayed to you and your provider daily. This allows you to be certain that your data and reports will be readily available for your needs at all times. In these cases, the limited connectivity of some of the basic models like the iBreeze or the Transcend Micro Travel CPAP may not be the best option for you.

Are you a “Tech Person”?

If you really like all the feedback and connectivity that modern technology can provide, then the model you choose is very important? There are only a few options that have high-functioning integrations. Those models would be the AirSense 11 from ResMed or the DreamStation 2 from Philips. Both have very high functioning apps that allow you to see your sleep data in detail. If that connectivity and data is of no concern to you, then you can address more important concerns such as price or other functionalities with your choice.

Do you travel much?

Most CPAP models come with a travel case that will allow you to pack up and take it on the road pretty easily. However, most home CPAP models are not so great for someone that travels frequently. In those cases, you may want to consider a Travel CPAP like the AirMini or DreamStation Go. Those options give you Bluetooth connectivity for transmitting report data as well as really nice apps for tracking you own results. If you don’t need reporting, then you can consider a model like the Z2 or TranScend Micro For most CPAP users on a Travel CPAP, they will use an HME (Heat Moisture Exchanger) instead of a Heated Humidifier. If you are someone that will require Heated Humidification on your Travel CPAP then the only options would be the DreamStation Go or the Transcend 365 Travel CPAP. You may also want to check in to the Electrical Specifications of the CPAP you are considering. For instance, the DreamStation 2 will run directly on 12 volts. This makes using it in a camper or vehicle much easier.

What do you want to spend?

The Cost of CPAP machines can vary widely. It can also be very dependent on availability (as we have seen recently). The top tier CPAPs such as ResMed and Philps are usually going to command a higher price. This is because they typically have the most Researched and Developed functionality. R&D can be more costly than manufacturing in many cases. With that being said, there are brands that allow you a very similar therapy at a lower cost. In these models such as Resvent or 3B you can expect to sacrifice some functionalities like connectivity or size. However, in most cases you will get a very similar therapy from the lower cost option as the more expensive version. Here at CPAPmyway we offer great financing options for your new CPAP. Click here to check that out.

Noise level?

Most of the modern CPAPs are pretty darn quiet. There isn’t a massive difference on the sound of the motor in most cases. Where you may notice significant noise differences is in the mask. The exhalation ports on each CPAP mask are very different. Some are diffused to the point that you can’t hear anything. Others could blow dry the hair of the person sleeping next to you. The only major noise level difference in CPAPs in the Travel CPAP arena. Travel CPAPs in general are usually louder than home CPAPs. This is because they have very little insulation to reduce the noise. Additionally, the noise difference between high-end travel CPAPs vs low-end travel CPAPs is definitely noticeable. Check out our blog on the best Auto CPAPs of 2022 for more information on Travel CPAPs. 

Universal Connection to masks?

Almost all of the CPAPs made today are a universal 22mm connection. This allows you to connect standard CPAP tubing. Standard connection means that 99% of all CPAP masks will hook up fine to your CPAP. As we stated above, you need options on the mask front. With that being said there is one Travel CPAP that doesn’t have universal connection. That is the ResMed AirMini. This unit will only allow you to connect the AirMini Tubing as well as specific ResMed AirMini Masks. 

Will I need Heated Tubing?

There are only a couple CPAPs that have available Heated Tubing options. Heating tubing is really only necessary when you need to add an inordinate amount of extra humidity to the air you are breathing on the CPAP. This is usually only an issue in dry climates. If you live in a dry area, then those models may need to be in your consideration. The current models that have heated tubing are the AirSense 11, DreamStation 2, Luna G3, and SleepStyle CPAPs. All of these have excellent humidification systems that include a heated tubing option. Most people do not start off with a heated tube, even when they are purchasing one of the models above. However, it may be something needed in the future.

How do I maintain my New CPAP?

Maintenance on your new CPAP Machine is pretty standard across the board. According to most manufacturers, your CPAP Mask, humidifier chamber, and tubing should all be cleaned daily with soap and water. That means disassembling everything daily, soaking in warm soapy water, rinsing and air-drying everything daily. From our perspective you may be able to get away with doing that as little as twice per week. If you are more of a dishwasher style person, then you may want to consider an Automatic CPAP Cleaner. We have some great options on that front to reduce your CPAP to-do list.

Continue reading...
  • By Clay Rollyson
  • /
  • /
I cannot count the number of times that someone has called to ask why there is always air leaking from their CPAP mask. In many cases that leak is an issue, but in just as many cases it is no issue at all. Let’s take a look at the different reasons for mask leak.

CPAP Mask Exhalation Port

No matter which CPAP mask you own, there will be air constantly blowing out of the designated exhalation port. This “leak” is essential in the performance of your CPAP mask. The air escaping from your CPAP masks exhalation port is designed to flush CO2. That is obviously essential to your breathing, so it is important that your exhalation port remain open and free of obstruction. The port is usually on the front of the mask. It may make some noise or may be difficult to notice at all.

General Mask Leak

If the air leaking from your CPAP mask is not coming from an obvious exhalation port, then it may be a problem. In most cases the leak is coming from a gap between your skin and the CPAP mask. The most common area is around the nose. For others the leak may be on the cheeks at the side of the mask or below the lip. All of these leaks are usually corrected with very little issue. So, let’s break it down in more detail.
  • Mask Leak around the bridge of your nose– This is usually when a standard nasal mask or full-face mask doesn’t match up to the users nose well. In these cases, you should start by tightening the mask slightly until the leak goes away. If the tightening becomes uncomfortable or painful, then you will need to check out a different style mask that avoids this problem area. Typically, a low-profile mask like the DreamWear line or ResMed versions does a good job. They will provide a seal without any contact to the bridge of the nose at all.
  • Mask leak on the side of the nose– This leak is usually caused by the exact opposite reason as the previous mask. If you start with a low-profile mask like the DreamWear or N30i, then you may have an issue with leak at the side of the nose. The first step to resolve this is to size down one cushion size and slightly tighten the mask. If that doesn’t work, and you like the fit of the mask then you may want to consider ordering the pillow version of that mask, such as the DreamWear Pillows or P30i. The pillows will stay in place much better than the cradle design. If all those steps fail, then it is time for a more traditional style CPAP mask like an Eson 2 nasal mask or the Vitera full face mask.
  • Mask leak to the sides or below the lip- This is another very common leak. In most cases you can slightly tighten the mask incrementally to account for the leak. If it gets to the point where the tightening is causing discomfort, then you may need a mask change. The more surface area that you have to seal the better the chance of a leak. That means the larger the mask the better chance it will have an issue. When you are in this scenario the best bet is to go to a smaller style mask. If you are on a minimal contact full face like the Amara View or the DreamWear Full, then you may want to consider something smaller like the DreamWisp or N30i Nasal Mask. If you are on a more traditional style full face like the Simplus, then you may want to consider a traditional nasal like the Eson 2 or maybe even a nasal pillow mask.

What if the leak isn’t from the mask?

In many cases you may hear air escaping, notifying you of a leak, but the noise isn’t coming from the mask. This can occur for a few different reasons. These are the main leaks that we have encountered outside of the mask leak:
  • Bad Tubing– It is very common that tubing will tear or pull loose from a connection point. Start at the junction of the mask and work your way down to the connection at the back of the CPAP. As you inspect the length of the tube look for any stretched areas or tears. It may also be a good idea to disconnect and reconnect the tubing to make sure that it has a solid connection.
  • Humidifier Chamber Leak– You humidifier chamber on the CPAP typically has silicone seals that keep it airtight. If one of those seals is torn, or bent, you may experience air leaking from that point. To inspect the humidifier chamber, you should remove it from the CPAP, open it up and take a look at all the seals to make sure that there is no damage. Then reinsert the chamber, making sure it is snapped in place securely.
  • Internal CPAP issues– Inside of the CPAP are seals and a blower motor. Over time these parts can go bad. If the noise is coming distinctly from the CPAP itself, then the only troubleshooting method is to inspect the filter. If the filter is clean, then you will have to contact your provider or a repair facility. For more information on CPAP repairs, click here. 
Continue reading...
  • By Clay Rollyson
  • /
  • /
Modern CPAP machines provide a myriad of information that can help you and your physician determine how well your CPAP is working for you. So much of this information is abbreviated or is shown as an acronym. This can make it really difficult to understand what in the world you are looking at. That is why we have taken the time to lay out a full explanation of all the things you see on those reports.

What are the categories on the CPAP report?

The first thing that you need to understand is what all the categories mean on your CPAP Report. Then, we can take a deeper dive below on what those categories represent. So, let’s start out by defining all those abbreviations and acronyms.
  • AHI– Apnea Hypopnea Index.
  • HI– Hypopnea Index
  • AI– Apnea Index
  • CAI– Central Apnea Index
  • RERA– Respiratory Effort Related Arousal
  • Cheyne Stokes– abnormal pattern of breathing
  • Leak– Air escaping above normal thresholds
  • Pressure– Amount of pressure created by the CPAP
  • Compliance percentage– percentage of nights greater than 4 hours of usage
Now, let’s dive in a little deeper on each subject.

Apnea Hypopnea Index (AHI)

The AHI is the total number of Apnea and Hypopnea events that occur divided by the total numbers of hours that you slept on the CPAP. This metric shows you the number of times per hour that you stopped or partially stopped breathing. It is important to monitor this metric because it is the main method for determining how well the CPAP is working for you. Generally, it is considered “normal” if your AHI is under 5. Of course, that is different for everyone and only your doctor can tell you what a healthy AHI is for you. For CPAP users that are on an Auto CPAP the AHI may take time to reduce. This is because the Auto CPAP takes time to adjust to the most suitable therapeutic pressure for you.

Apnea Index (AI)

The Apnea Index is a further breakdown of the AHI. The AI is the number of times per hour that you had an apnea divided by the total hours that you were using the CPAP. The Apnea Index is typically broken down by: Obstructive Apnea, Central Apnea, and Unknown Apnea. All Apnea is defined as a stoppage of breathing for at least 10 seconds. Obviously, breathing is pretty important. Usually as you stop breathing for that length of time, your blood oxygen level falls as well. Enough Apnea events over time can cause all sorts of health concerns. Because the AI is part of your AHI score you should refer to the AHI metric for what should be determined as a “normal” score for this metric.

Hypopnea Index (HI)

A Hypopnea is very similar to the Apnea in how it is determined. The hypopnea index is the total number of hypopneas divided by the total hours of sleep. By definition a Hypopnea is when your breathing shallows to at least a 30% from your normal airflow, in addition to at least a 4% in your blood oxygen level. To boil that down, a hypopnea is when your breathing is partially blocked, and that partial blockage causes a reduction in blood oxygen. The hypopnea index is usually added to your apnea index and totals as your Apnea Hypopnea Index. That “normal’ range is cited above.

Central Apnea Index (CAI)

Central Apnea is another form of apnea that is added into the overall AI score. The Central Apnea Index is again the total number of Central Apneas divided by the total number of hours you slept. A Central Apnea is when you stop breathing, but your brain doesn’t tell you to breathe like it normally should. It is more a neurologic issue and, in most cases, requires a different therapy than standard CPAP. In many cases you may be prescribed an ASV (Auto Servo Ventilator). This total score is a part of your total AHI score, and the goal is typically to be under a total of 5 AHI. Of course, only your doctor could determine that for you. If your CAI is high even on your CPAP, you should certainly speak to your doctor about this to see if a more appropriate therapy should be prescribed.

Respiratory Effort Related Arousal (RERA)

The RERA is when your brain causes your breathing to become labored, and you are aroused from your sleep. Usually, it is represented by limitations in breathing, occurring for more than 10 seconds continuously. It is not classified as Apnea or Hypopnea but can cause some of the same symptoms if untreated. If you are seeing a significant amount of RERA on your CPAP Report, then it would be smart to consult your doctor. In most cases CPAP will resolve this issue, but if it continues on CPAP an alternative therapy may be necessary.

Cheyne Stokes Respirations

Cheyne Stokes are when you go into an abnormal breathing pattern. It is usually a progressive deeper breathing pattern than can become more rapid at first and then decreases resulting in complete stoppage of breathing (Apnea). This pattern can be repetitive for 1-2 minutes at a time in many cases. It also may repeat over and over throughout the night. In most cases your CPAP should resolve the Cheyne Stokes breathing, but in some rare cases it may not. If you have continued Cheyne Stokes on your CPAP Report, you should speak with your doctor about changing therapy or switching to a better alternative therapy.

Leak

Leak is classified in liters per minute of air escaping from your mask or tubing. It can also be from a poorly attached humidifier. On the CPAP report the leak may be shown at multiple points such as: Median Pressure leak, Maximum Pressure leak and 95th Percentile leak. This is because a leak at the maximum pressure is not nearly as concerning as a leak at your 95th percentile pressure. By most opinions the leak should not be over 24 lpm. If it is over that threshold, you should do a close inspection of all connections to make sure that everything is together correctly. If everything is tightly attached, then you should work to adjust your mask for a more secure fit. With that being said there are a couple things to keep in mind about leak
  1. There is a good chance that you will have some leak. Very rarely does anyone have a perfect mask fit throughout the entire night. Adjusting your mask to keep your leak in a proper range is good, but do not make yourself miserable over a minimal leak.
  2. Your mask will have air escaping at all times. I can’t count the times customers have come in with a mask that had tape over an exhalation port. You do not want to do that. All CPAP masks have an exhalation port that allows you to properly exhale CO2. Usually, it is in an obvious area with small holes.

Pressure

Pressure is the measurement of force that the CPAP is pushing to keep your airways open. It is classified in Centimeters of water pressure, typically abbreviated as “cm”. If you are on a fixed pressure CPAP this will most likely be one pressure without much else on the CPAP Report. If you are on an Auto CPAP, then you may see a few different pressures. I will detail those below:
  • Median Pressure– This is the average pressure that your CPAP is at from start of therapy to end.
  • 95th percentile– This is the pressure that is providing the most effective therapy. In other words, this is the pressure that is working best to resolve your apnea. This may change from time to time.
  • Maximum Pressure– This is the highest amount of pressure that your CPAP is reaching during your CPAP therapy.

Compliance Percentage

For a real detailed look at compliance percentages, I would refer you to our compliance video that lays CPAP compliance out in detail. In summary, the report will typically show nights greater than 4 hours of usage as compliant nights. The number of nights with 4+ hours of usage divided by the total number of nights used will give you that percentage on your CPAP Report. For Instance: if you had 21 nights of 4+ hours usage out of a total of 30 nights, then your compliance percentage will be at 70%.
Continue reading...
  • By Clay Rollyson
  • /
  • /
  If you need a new CPAP then you need to learn from our experience. We deal with thousands of CPAP users. From first timers to 10 years plus CPAP veterans. We have taken all that feedback and combined it with our years of industry experience to give you the right advise on your next CPAP.

Why should I buy an Auto CPAP?

The first thing that you need to know is that there is NO REASON to buy a fixed pressure CPAP. In fact, most manufacturers seem to be moving away from selling them. If you need to understand the difference between fixed pressure CPAP and Auto CPAP, then click here to check out the blog on that subject. Even if you are prescribed a fixed pressure setting you are doing yourself a disservice to buy a CPAP that can only do a fixed pressure.

Our Top 4 Auto CPAP Picks

There are quite a few options in the CPAP world these days. For the sake of this article, we are going to focus in on the top 4 Auto CPAPs for home use. We have some great info on Travel CPAPs as well in another blog.

#4: Luna 2 Auto CPAP

The Luna 2 Auto CPAP is a great CPAP option overall. If you need a cost-effective Auto CPAP that will work great for years, then this is definitely in the consideration. It has a comfortable algorithm that works very well. It has universal connections so that you can use any standard mask or tubing. The Luna 2 is definitely durable. We have had very few issues. In fact, the only issue of significance has been humidifier failures. They have been few and far between, but we have had a handful of those. Let’s take a look at the major pros and cons for the Luna 2.

Luna 2 Pros:

  • Simple and effective– While there aren’t many bells and whistles on the Luna 2 that isn’t a bad thing. You have all the standard features that you would expect and need without any fluff.
  • Durable– We have had so few issues with the Luna 2 that we can confidently say it is very durable. The only issue we can site is humidifier issues. They have been very few and far between (less than 1%), and the CPAP will still operate just fine without humidity if you happen to be that unlucky.
  • Cost effective– The Luna 2 CPAP is priced affordably. You can save 30% plus on the cost of Auto CPAP therapy without sacrificing quality or effectiveness.
  • Universal connection– This CPAP features the standard 22mm tubing connection. This means that you can use any mask or standard CPAP tubing on the Luna 2.

Luna 2 Cons:

  • Larger and heavier than others– It is definitely bigger and heavier than the other options. If you don’t plan on traveling with it, then that may not be an issue.
  • Compliance reports aren’t as easy– You can use the i-code or SD card to obtain a compliance report from the Luna 2 without any additional accessories, but both of those options are manual. We have a detailed blog on the Luna 2 compliance reporting.
  • Poor heated tubing option– 3B did try a heated tubing that has a cord for the Luna 2, but it was not good. Now the only tubing option we carry for the Luna 2 is standard tubing. If you need significant humidity while on CPAP you may have issues.
  • Poor warranty process– On the rare occasion that we have had to work through warranty repair of replacement for a Luna 2 it has been very slow. In most cases it took weeks to get a broken device resolved.

#3 iBreeze Auto CPAP

The iBreeze Auto CPAP is a fairly new CPAP to the market here in the U.S. It has been in foreign markets like Asia and Europe for years and has a great track record there. We have been carrying it now for about 8 months and it has been a great option. It is quiet and simple. Plus, the iBreeze is as small as the larger brands. So, finding space on your nightstand or traveling with it is a “breeze” ;). We have had very few repair issues so far which is great. It is a fairly cost-effective option and it works well.

iBreeze Pros:

  • Small footprint on the nightstand– Whether you have limited nightstand space or you plan to travel often with your CPAP the iBreeze is sized right.
  • Simple to use– There is nothing complicated on the iBreeze. Simple on/off button, and easy to navigate the patient menu.
  • Wi-Fi connectivity option– The iBreeze now has an optional integrated Wi-Fi modem. This allows you to connect your CPAP to your home Wi-Fi network for automated uploads. This makes compliance reporting much easier. Check out our iBreeze compliance blog.
  • Universal Connection– Use any mask or tubing on the iBreeze. It has the standard 22mm connection which allows for any standard CPAP tubing.

iBreeze Cons:

  • No heated tubing option– If you need high humidity while using CPAP then you need to consider the limitations of standard tubing.
  • Poor SmartPhone App– Resvent has launched an app for the iBreeze, but to date, it does not work at all.
  • Exhalation relief setting is overly sensitive– We have found through feedback and experience that the IPR setting can be a little tricky. At the higher IPR setting many users have told us that they feel a very dramatic pressure decline. The IPR setting of 1 seems to do the trick in most cases.

#2: DreamStation 2 Auto CPAP

The DreamStation 2 from Philips Respironics is an awesome Auto CPAP. It is very small and lightweight. Additionally, it has awesome connectivity options, a great app to follow your sleep, as well as great durability. The unfortunate thing about the DreamStation 2 is it’s current availability. At the time of this blog writing the DreamStation 2 is unavailable for purchase due to the Philips Respironics recall. It has a great algorithm that has been time-tested for comfort and effectiveness. The DreamStation 2 features a touchscreen menu for easy navigation as well as a fully integrated heated humidifier. Let’s take a look at some detailed Pros and Cons:

DreamStation 2 Pros:

  • Very Small and lightweight– The DreamStation 2 is extremely lightweight and takes up very little room on your nightstand. It makes a great option for travel.
  • Great DreamMapper smartphone app– The DreamMapper app offers daily insights into how well the DreamStation 2 is working for you. It does this easily through bluetooth connectivity.
  • Easy compliance reporting– The DreamStation 2 has Bluetooth connectivity as well as cellular connectivity. This means that we can access your data remotely and provide great compliance reporting easily. If you need reports for your job or for follow up with your Physician, this is a great option.
  • Best heated tubing option– The heated tubing that was designed for the DreamStation 2 is the smallest and lightest available. Most times adding in heated tubing means bulkier and heavier tubing, but not in this case.

DreamStation 2 Cons:

  • Touchscreen can be a little wonky– The touchscreen is not exactly the most responsive. It may take an extra swipe or press from time to time to get where you need to in the patient menu.
  • Availability– Currently it is completely unavailable. We anticipate having them again soon and you can click here to see current availability.
  • Filter location– You have to completely remove the humidifier chamber to access the filters. Adding an extra step to your normal filter maintenance.

#1: AirSense 11 AutoSet

For our top pick of 2022 we have chosen the AirSense 11. It is the latest CPAP from ResMed. It has a ton of great features and is a real user-friendly CPAP option. The main thing that makes this CPAP great is the same thing that has made ResMed CPAPs great for decades. It is the algorithm. The algorithm in this CPAP is tried and true for comfort and effectiveness. That means that when the AirSense 11 is adjusting to your most suitable pressure it is doing so in the most comfortable manner. Every manufacturer has their own proprietary algorithm, and ResMed leads the pack for sure. Let’s check out some of the Pros and Cons on the ResMed AirSense 11 AutoSet:

AirSense 11 Pros:

  • Very small and lightweight– The AirSense 11 is one of the smallest and lightest options available. You can travel with ease using the slim travel case that is included.
  • User friendly menu and touchscreen– The touchscreen is very nice and very responsive on the AirSense 11. It allows you to navigate your patient level menu easily.
  • Great MyAir app– The ResMed MyAir app is a great way to follow your sleep therapy results. It provides a daily score as well as great input and instructions for your AirSense 11 CPAP.
  • The best Auto Algorithm available– For decades now ResMed has made a top tier Auto-titrating algorithm. This means that it will adjust to the best pressure in a comfortable way. Instead of making abrupt changes that will interrupt your sleep.

AirSense 11 Cons:

  • Availability– Much like other CPAPs currently, the AirSense 11 is super-hard to find right now. Most of that due to its popularity and industry wide CPAP shortages. Click here to check current supply. We do receive them regularly and they go in and out of stock frequently.
  • Not cheap– Because it is a very high-quality Auto CPAP, and industry wide shortages the AirSense 11 is not the cheapest option. It is a premium price for the premium product.
  • Filter door is brittle– The only quality issue we have encountered so far is a brittle filter door. On inspection we accidentally broke it. They are available separately if you encounter the same issue.
Continue reading...
  • By Clay Rollyson
  • /
  • /

After my wife asked me last week, “why isn’t my CPAP using water anymore?”, I finally thought to write a blog on the topic. She would wake up and pull her humidifier chamber in the morning, only to find that the water level had not changed at all. This happens from time to time, usually as seasons change, and most likely is not an issue at all. So, what is going on?

Why isn’t my CPAP using water?

Most modern CPAP machines are built with a hydrometer and thermometer that constantly monitor your room’s ambient conditions. The CPAP is doing this because it is trying to avoid excess condensation. Better known as “rainout”. That happens when the CPAP adds more humidity than the air in your room can hold. When that happens you literally end up with rain inside your tubing. By monitoring the humidity and the temperature the CPAP tries to minimize the chances of adding too much humidity. That means that if your CPAP is detecting that the room is too cold or that the room already has too much humidity, then it will not add any additional humidity. In turn, your water chamber will still be full in the morning.

How can I tell if the Humidifier is actually working?

The first thing to determine if the humidifier is actually doing its job or not is to ask yourself a simple question: “Do I feel dried out?”. If your answer is no, then you don’t have a problem. Just because there is no change in water level, doesn’t mean that there is an issue. If your answer to that question is yes, then the first thing that you should do is increase the humidity setting. This setting should be located in your patient menu. If you have increased the humidity to the max and there is still no change, then we need to bypass the check system. We detail how to do that below. Additionally, on some newer CPAP models like the ResMed AirSense 11, you can see on the sleep report whether or not the humidifier is working correctly.

How can I add more humidity without rainout?

So maybe you are dried out because the CPAP will not add enough humidity. In that case there is a pretty simple solution. You can add heated tubing to your humidification system. Almost all of the newer CPAP models have an available heated tube. ResMed has one called ClimateLine and Respironics has heated tubing for theirs as well. These heated tubes will keep a controlled environment from the outlet of the CPAP all the way to your CPAP mask. This means that the ambient humidity and temperature conditions in your room will not matter. Once the heated tube is added you can increase humidity level to a comfortable setting without the risk of rainout or the CPAP capping your humidity. We also have a great Blog on the rainout issue as well.

Things to consider about your CPAP Humidifier:

  • Empty the water chamber daily– Regardless of whether or not your CPAP used any water, you still need to empty it and allow it to dry out daily. This will prevent mold, mildew, and bacteria from growing in the stagnant water.
  • Stick to distilled water– As the water evaporates it leaves behind the minerals that were in the water. These minerals can be harmful to the CPAP parts. Causing corrosion as well as a breeding ground for all sort of nasty things.
  • Clean the water chamber at least weekly– If there is one, most-important thing, on your CPAP that can make you sick, it is the water chamber. You wouldn’t fill your chamber with pond water so don’t let the water chamber turn in to a pond. Clean it at least once per week with mild soap and water.

When do I change my Water Chamber?

Changing out your Humidifier Water Chamber is completely dependent on how well you are maintaining your water chamber. If you are emptying it daily and washing it at least once per week, then you may get as much as a full year out of the tank. If you are using tap water, well water, or aren’t cleaning the water chamber then you may get as little as 3 months. On average it is best to change out your water chamber about every 6 months.

Signs that it is time to change out your CPAP water chamber:

  • Leaking water tank and/or water on your nightstand.
  • Mineral buildup inside the tank
  • Mold or mildew growing inside
  • Air leaking from the silicone seals
  • Significant discoloration
 
Continue reading...